How to setup a new Flutter project with Firebase, Firestore, Crashlytics, Analytics, and more. 847 words.

Last Updated
The following guide is designed to get you up and running with Flutter and Firebase on both iOS and Android. In addition to the core setup, we will also configure optional services like Crashlytics, Performance, and App Distribution.
💡 If you run into issues, refer to official FlutterFire setup instructions.
Create your Flutter App
First, make sure you have Flutter installed. Create an app and open it an IDE (VS Code or Android Studio).
flutter create my_app
code my_app
Install Dependencies
Below are the dependencies used in most FlutterFire apps, however the only required package is firebase_core, so feel free to remove any packages you don’t plan on using.
dependencies:
  flutter:
    sdk: flutter

  firebase_core:

  # Database
  cloud_firestore:

  # User Auth
  firebase_auth:
  google_sign_in:

  # Analytics
  firebase_analytics:

  # Crashlytics
  firebase_crashlytics:

  # Performance
  firebase_performance:
Note: You can find the latest FlutterFire package versions.
Android Setup
First, you need to decide on a project ID for your app using the following pattern <com>.<brand>.<app>. For example, the app for Fireship would be io.fireship.lessonapp. Create your app from the Firebase console.
SHA1 Certificate (Optional)
An SHA1 certificate identifies your local machine allowing you use certain Firebase features, like Google Sign-In and Phone Auth.
cd android
./gradlew signingReport

Use the debugAndroidTest SHA1 value when creating your project from the Firebase console.
Download and save the google-services.json
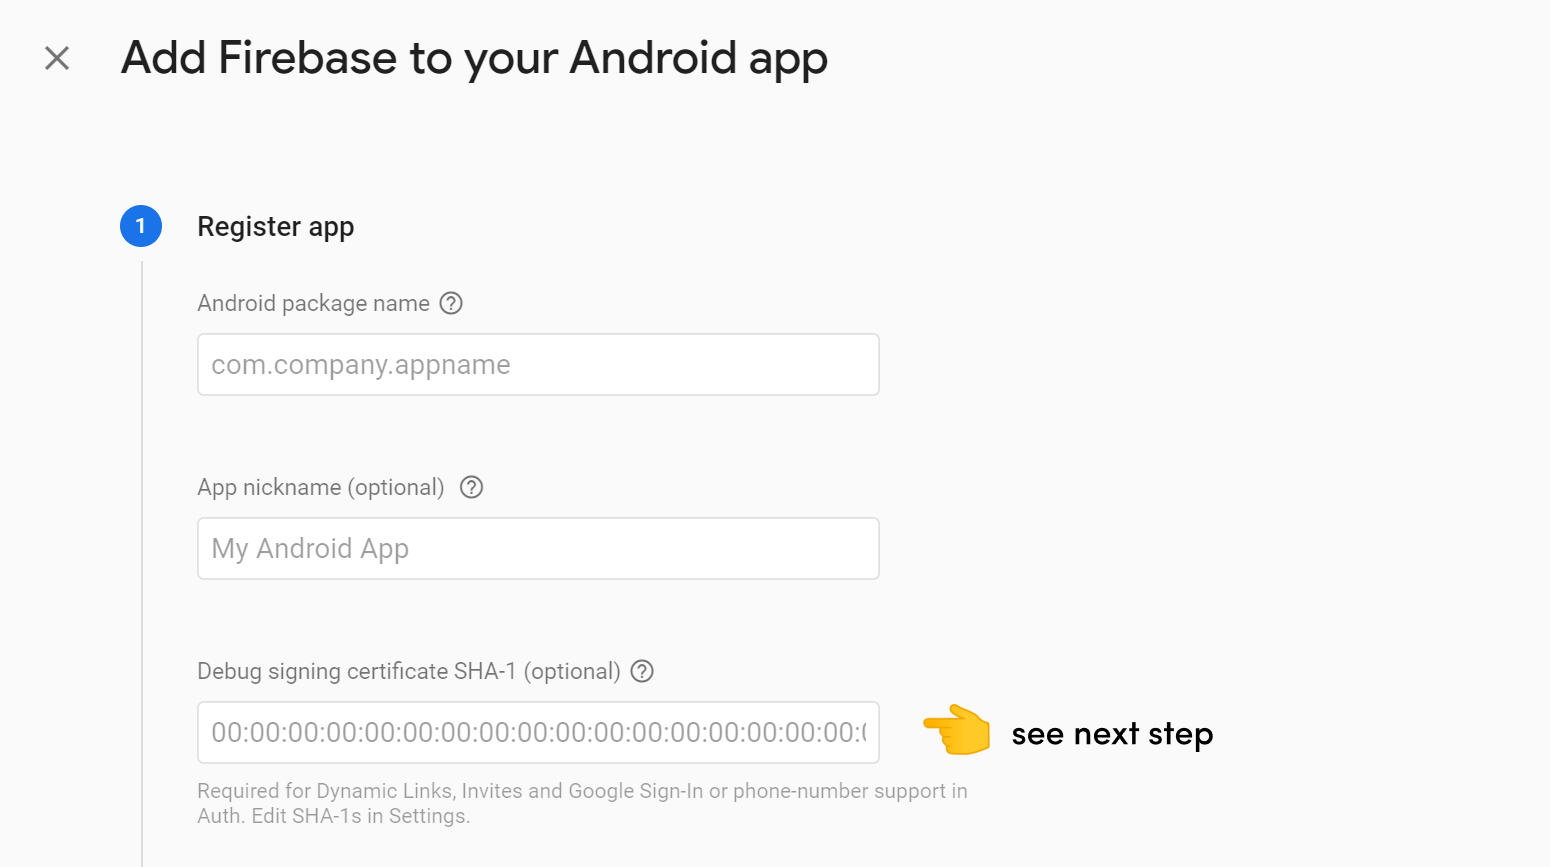
Next, go to the Firebase Console and register your app by clicking Add Firebase to your app Android. Enter your project ID and SHA1 certificate from the previous step.
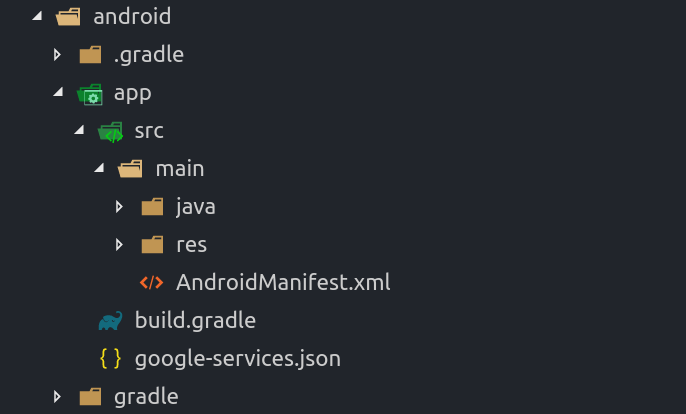
Download the google-services.json file to the android/app directory. At this point, you can skip all remaining steps in the Firebase console (Flutter does this stuff automatically).
Update the build.gradle files
Now we need to register our Google services in the Gradle build files.
buildscript {
   dependencies {
       // ...
       classpath 'com.google.gms:google-services:4.3.3'  // <-- here
   }
}
Next, update your project ID and register the Google services plugin at the bottom of gradle build file in the app directory.
apply plugin: 'com.android.application'
apply plugin: 'com.google.gms.google-services' // <-- add this line

// ...

    defaultConfig {
        applicationId "io.fireship.lessonapp" // <-- update this line
        minSdkVersion 21 // <-- you might also need to change this to 21
        multiDexEnabled true // <-- optional, but recommended
    }

    // ...

    dependencies {
      implementation 'com.android.support:multidex:1.0.3'
    }
That’s it. Try executing flutter run with an Android device emulated or plugged-in to verify the setup worked.
iOS Setup
The iOS setup is less tedious and can be completed in one step.
Register and Download the GoogleService-Info.plist
Click add your app to iOS then download the GoogleService-Info.plist. Open the ios/runner.xcworkspace directory with Xcode, then drag the plist file into the Runner/Runner directory.

Signing Certificate
You must have a valid iOS Signing Certificate from your Apple Developer Account. If not, you will receive an error of No valid code signing certificates were found. Follow the steps below:
- Log in with your Apple ID in Xcode first
- Ensure you have a valid unique Bundle ID
- Register your device with your Apple Developer Account
- Let Xcode automatically provision a profile for your app
- Rebuild your Project
Emulator Setup
Firestore Emulator
Checkout the following snippet to use the Firestore Emulator in Flutter.
🔥 Also checkout the advanced emulator tutorial for additional tips and tricks.
Optional Superpowers
There are several additional Firebase superpowers you will likely want in your app bundle from day-one. Let’s go ahead and install them now.
Analytics
Firebase Analytics can automatically collect data about your users and the screens they view in the app. Analytic data is a precursor to many other Firebase features like Predictions, Remote Config, and more.
import 'package:firebase_analytics/firebase_analytics.dart';
import 'package:firebase_analytics/observer.dart';

FirebaseAnalytics analytics;

void main() {
  analytics = FirebaseAnalytics();
  runApp(MyApp());
}
Performance Monitoring
Performance Monitoring is another automatic tool that will help you find performance bottlenecks and improve the user experience. Think of it as a ⏲️ timer that can aggregated across your entire user base.
Include the package in your source code for automatic traces, or setup a custom trace.
import 'package:firebase_performance/firebase_performance.dart';

// Custom trace example

class _MyHomePageState extends State<MyHomePage> {

  _perfTrace() async {
    Trace trace = FirebasePerformance.instance.newTrace('cool_trace');
    trace.start();
    await Future.delayed(Duration(seconds: 5));
    trace.stop();
  }

}
Crashlytics
Crashlytics detects errors and aggregates them into issues. It is a highly valuable feature for detecting problems that affect specific devices and user groups (before they turn into bad reviews on the app store).
buildscript {
 ]
    dependencies {
        // ...
        classpath 'com.google.gms:google-services:4.3.3'
        classpath 'com.google.firebase:firebase-crashlytics-gradle:2.2.0'
    }
}
Next, update your project ID and register the Google services plugin at the bottom of gradle build file in the app directory.
apply plugin: 'com.google.firebase.crashlytics'
apply plugin: 'com.google.gms.google-services'

// ...


  dependencies {
    implementation 'com.google.firebase:firebase-crashlytics:17.1.1'
  }
And finally, use the crashlytics plugin to catch all Flutter errors in at runtime.
import 'package:firebase_crashlytics/firebase_crashlytics.dart';

void main() {
  Crashlytics.instance.enableInDevMode = true; // turn this off after seeing reports in in the console.
  FlutterError.onError = Crashlytics.instance.recordFlutterError;
  runApp(MyApp());
}
Next Steps
At this point, you should be able to serve the app by running flutter run without breaking. If you want to learn more about Flutter Firebase stack, consider enrolling in the Flutter Firebase Full Course.