Build a realtime user presence system with AngularFire to detect when a user is online, offline, or away. 1054 words.
Last Updated
Health Check
@angular/core@7.2
@angular/fire@5
rxjs@6
Social media and chat apps (think Slack, Facebook Messenger, etc) often have presence detection systems that can indicate if your friends are online, offline, or away. Traditionally, features like this have been challenging because you need manage state between the client & server, but the Firebase RealtimeDB makes it easy. The following lesson will show you how to build a realtime user presence system with Angular and Firebase.

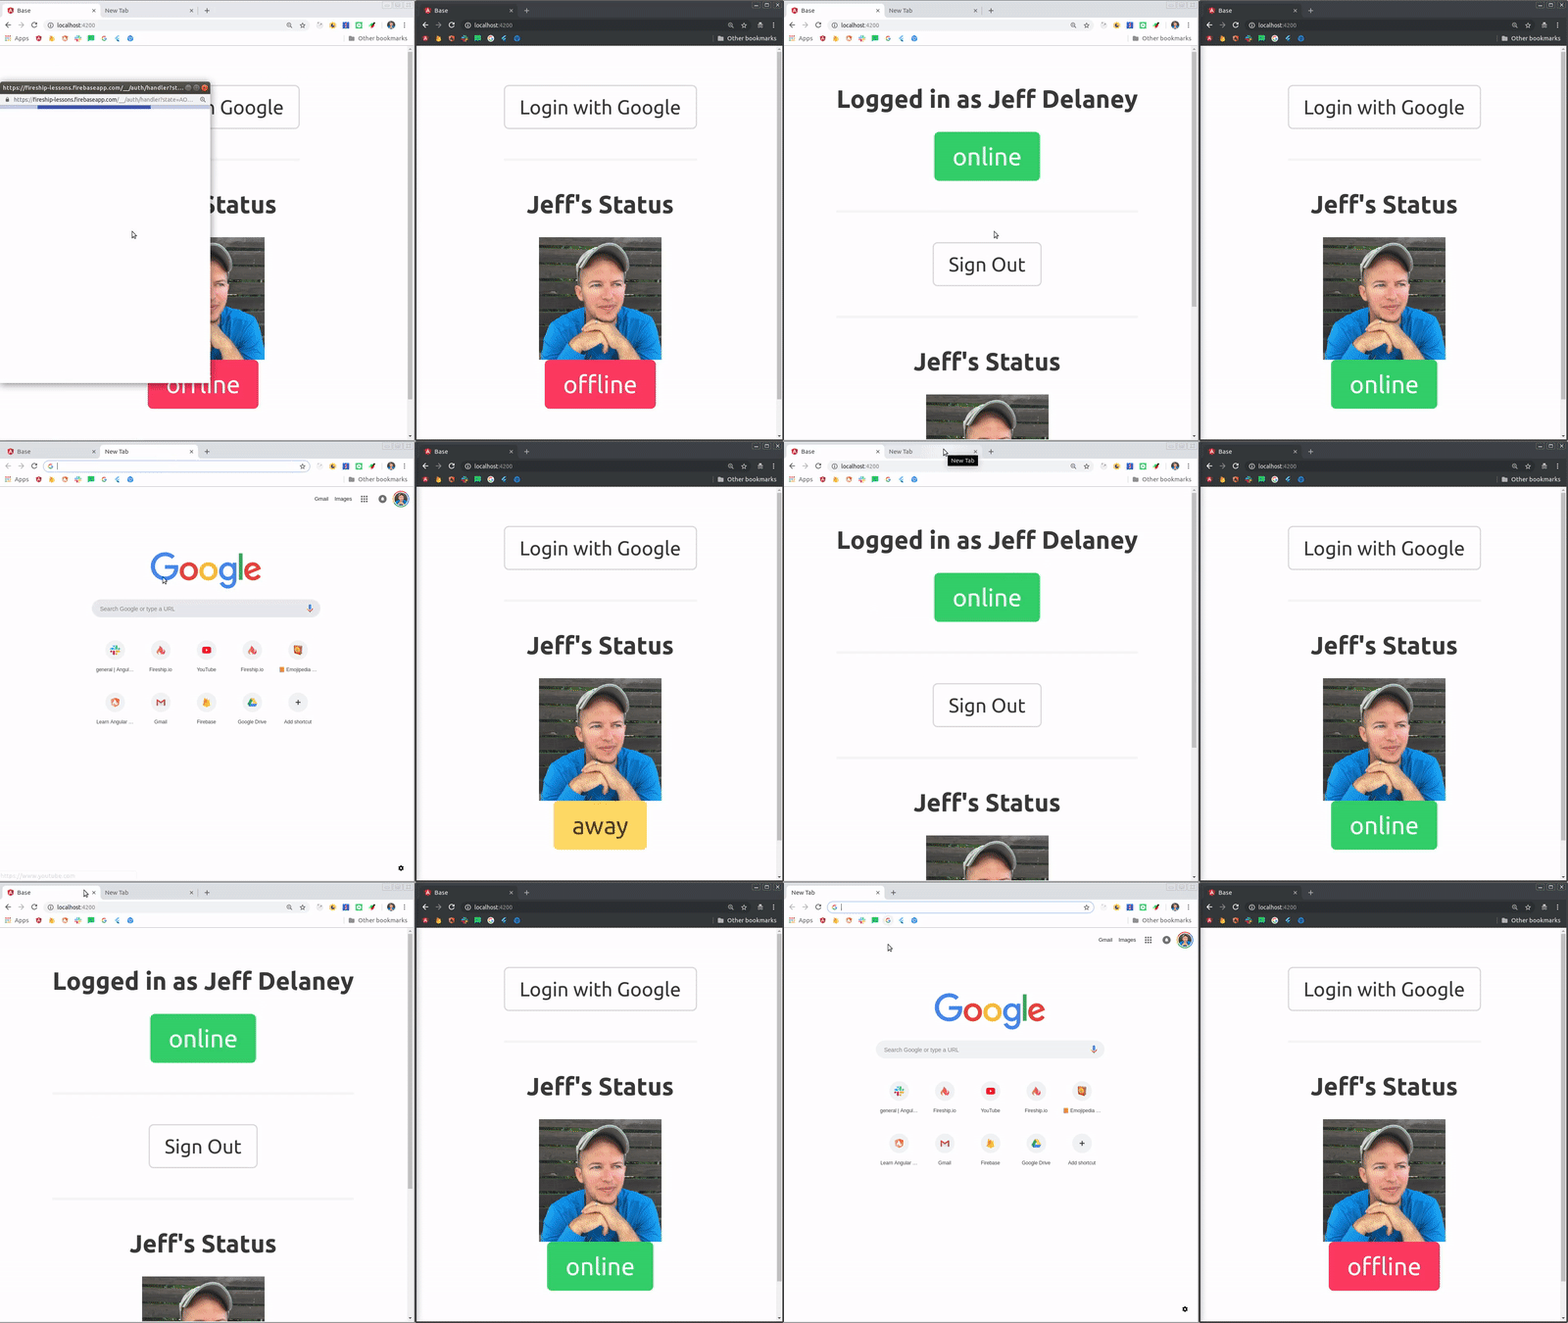
The browser on the left shows the actual user activity, while the browser on the right is just a neutral observer of the presence changes
Step 0: Prerequisites
- Install Angular ✔️ How to install Angular
- Install @angular/fire ✔️ How to install @angular/fire, aka AngularFire2
- You should have a working user auth system in place. Most of the relevant code for the auth service is shown below, however I recommend following Firebase Authentication System lesson first.
Step 1: Listen to the Realtime DB Connection
There are at least five distinct states that need to be addressed. Keep in mind, you may find additional edge cases beyond these.
- Signed-in and using app (online 💚)
- Signed-in but app is closed (offline 🔴)
- Signed-in but on a different browser tab (away 💤)
- Signed-out but app is still opened (offline 🔴)
- Signed-out and app closed (offline 🔴)
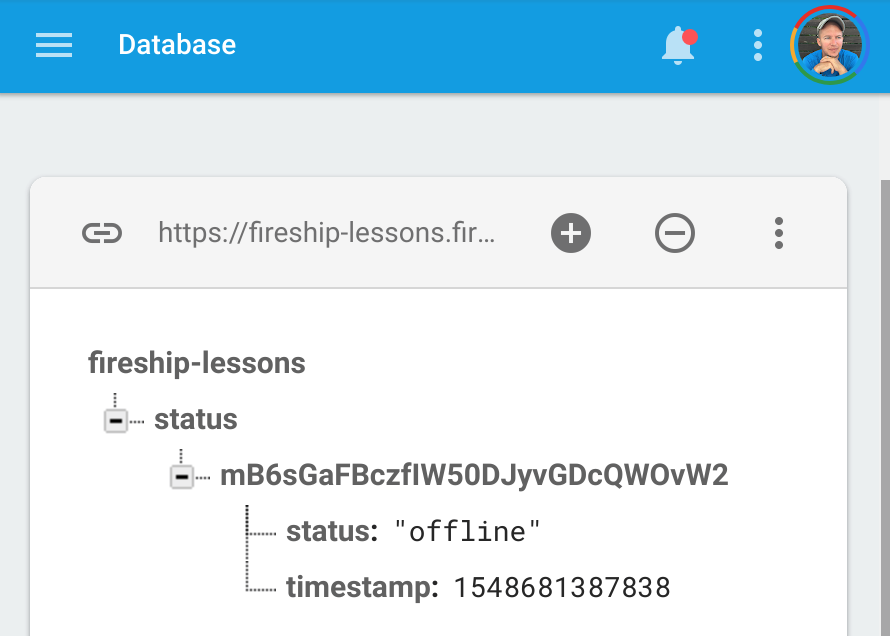
In the database, we keep track of a user’s presence under a the status/{uid}/ node.

In Angular, let’s start by generating a service to handle the business logic for presence detection.
ng g service presenceBase Service
Our service will start by implementing a series of helpers aimed at making our code composable and readable. Here’s a breakdown of each method so far.
getPresenceretrieves the presence data from DB as an Observable.getUserreturns the current user as a Promise.setPresenceupdates the DB with a new presence value.timestampgetter for the Firebase server timestamp.
Also, notice how we are setting up a few subscriptions in the constructor - these will be implemented in the following sections and they are responsible for updating the user’s status reactively.
import { Injectable } from '@angular/core';
import { AngularFireAuth } from '@angular/fire/auth';
import { AngularFireDatabase } from '@angular/fire/database';
import * as firebase from 'firebase/app';
import { tap, map, switchMap, first } from 'rxjs/operators';
import { TouchSequence } from 'selenium-webdriver';
import { of } from 'rxjs';

@Injectable({
  providedIn: 'root'
})
export class PresenceService {

  constructor(private afAuth: AngularFireAuth, private db: AngularFireDatabase) {
    console.log('let there be presence');
    this.updateOnUser().subscribe();
    this.updateOnDisconnect().subscribe();
    this.updateOnAway();
  }


  getPresence(uid: string) {
    return this.db.object(`status/${uid}`).valueChanges();
  }

  getUser() {
    return this.afAuth.authState.pipe(first()).toPromise();
  }


 async setPresence(status: string) {
    const user = await this.getUser();
    if (user) {
      return this.db.object(`status/${user.uid}`).update({ status, timestamp: this.timestamp });
    }
  }

  get timestamp() {
    return firebase.database.ServerValue.TIMESTAMP;
  }

  // Implement presence logic here

}
Online Status 💚
The code below takes care of the online status. When the user logs in or opens the app, it will switchMap to an Observable of the database connection, then update the logged-in user’s presence.
// Updates status when logged-in connection to Firebase starts
 updateOnUser() {
    const connection = this.db.object('.info/connected').valueChanges().pipe(
      map(connected => connected ? 'online' : 'offline')
    );

    return this.afAuth.authState.pipe(
      switchMap(user =>  user ? connection : of('offline')),
      tap(status => this.setPresence(status))
    );
  }
Offline Status 🔴
The offline status is dependent on the onDisconnect hook, which will run an update when the database connection is lost. Also, the app’s signOut handler should update the status because the database connection may still be active after the user logs out.
  updateOnDisconnect() {
    return this.afAuth.authState.pipe(
      tap(user => {
        if (user) {
          this.db.object(`status/${user.uid}`).query.ref.onDisconnect()
            .update({
              status: 'offline',
              timestamp: this.timestamp
          });
        }
      })
    );
  }

async signOut() {
    await this.setPresence('offline');
    await this.afAuth.signOut();
}
Away or Idle Status 💤
The away status is completely optional, but it does add a nice touch. We check if the app’s browser tab is open using the Page Visibility API.
Keep in mind, we are touching the DOM directly here, so this code will not work with server-side rendering or other non-web platforms.
  // User navigates to a new tab, case 3
  updateOnAway() {
    document.onvisibilitychange = (e) => {

      if (document.visibilityState === 'hidden') {
        this.setPresence('away');
      } else {
        this.setPresence('online');
      }
    };
  }
Step 2: Show the Status in the UI
At this point, we have all the business logic in place for realtime presence. Let’s create a component that will consume the data from the RealtimeDB.
ng g component user-statusListen to Presence Updates Globally
In most cases, you should start tracking user presence as soon as your app starts. In Angular, we can achieve this by injecting the service in the AppComponent constructor.
export class AppComponent {
  constructor(public presence: PresenceService) {}
}
User Status Component
The component takes a UID as an input property, then uses it to read the database.
import { Component, OnInit, Input } from '@angular/core';
import { PresenceService } from '../services/presence.service';

@Component({
  selector: 'app-user-status',
  templateUrl: './user.component.html',
  styleUrls: ['./user.component.scss']
})
export class UserStatusComponent implements OnInit {

  @Input() uid;

  presence$;

  constructor(private presence: PresenceService) { }

  ngOnInit() {
    this.presence$ = this.presence.getPresence(this.uid);
  }

}
The HTML can use NgClass to conditionally display a green, yellow, or red label based on the presence Observable. Note: the CSS classes below come from Bulma, so make sure to replace them with your own styles.
<div *ngIf="presence$ | async as presence" class="tag is-large"
      [ngClass]="{
          'is-success':  presence.status  === 'online',
          'is-warning': presence.status  === 'away',
          'is-danger':  presence.status  === 'offline'
      }"
>

  {{ presence.status }}
</div>
Lastly, you need to put the component to use in the app. Generally, this would be done after querying a list/collection of users.
<app-user-status [uid]="some-uid"></app-user-status>The End
We now have a full realtime presence system that is effective in the majority of use-cases. It could be improved by implementing sophisticated logic for determining the away status and/or give users the ability to set their status manually. If you have any questions please drop us a line in Slack.
