Build an app capable of fulltext search using Redis and Next.js 793 words.
Last Updated
Redis is an in-memory key-value store that is often used as a cache to make traditional databases faster. However, it has evolved into a multimodel database capable of fulltext search, graph relationships, AI workloads, and more.
In the following tutorial, we use Next.js and Redis Enterprise Cloud to build a webapp that can store JSON data in the cloud, then query it with results that update instantly in the UI.
Initial Setup
Sign Up for Redis Cloud
There are many ways to setup Redis, but the quickest option is the free tier on Redis Enterprise Cloud.

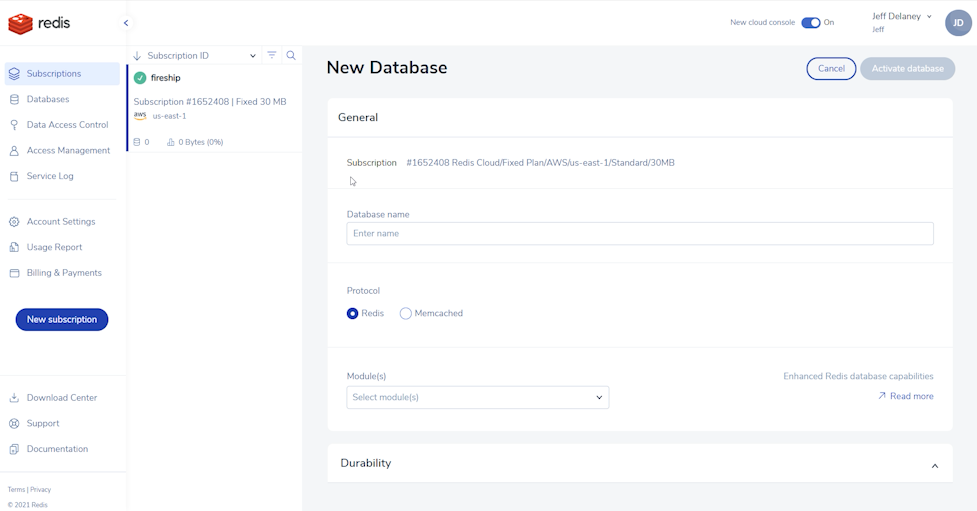
Create a new database on Redis Cloud
Make sure to add RedisSearch and RedisJSON modules when configuring your database. I also highly recommend downloading Redis Insight desktop app to visualize your data.
Next.js Setup
Create a new next.js app, then install Redis OM - a library that supports object mapping for Redis in Node.js.
npx create-next-app my-app
cd myapp

npm install redis-om
Now, we need to tell Next.js how to connect to the database. Create a file to hold an environment variable called REDIS_URL. Replace the values with config details provided by Redis Enterprise Cloud.
REDIS_URL=redis://default:PASSWORD@HOST:PORT
Lastly, create a file that initializes the database client and connects to it.
import { Client, Entity, Schema, Repository } from 'redis-om';

const client = new Client();

async function connect() {
    if (!client.isOpen()) {
        await client.open(process.env.REDIS_URL);
    }
}
Create JSON Documents
The app first needs to store JSON documents in Redis. Each document will represent a car, like a Tesla Model 3 or Toyota Camry.
Define a Schema
Redis OM allows us to provide a consistent schema by extending the Entity class.
class Car extends Entity {}
let schema = new Schema(
  Car,
  {
    make: { type: 'string' },
    model: { type: 'string' },
    image: { type: 'string' },
    description: { type: 'string', textSearch: true },
  },
  {
    dataStructure: 'JSON',
  }
);
Save a Document
Each entity is managed by the Repository class, which is responsible for saving and retrieving individual documents. When an entity is saved, it is assigned a unique ID as a Redis key, like Car:xyz123.
export async function createCar(data) {
    await connect();

    const repository = new Repository(schema, client);

    const car = repository.createEntity(data);

    const id = await repository.save(car);
    return id;
}
Next.js API Route
Implement a Next.js API route to execute the database write on the web.
import { createCar } from '../../lib/redis';

export default async function handler(req, res) {
    const id = await createCar(req.body);
    res.status(200).json({ id })
}
React Form
Implement a React component to collect data from an HTML form.
export default function CarForm() {
    const handleSubmit = async (event) => {
      event.preventDefault();

      const form = new FormData(event.target);
      const formData = Object.fromEntries(form.entries());

      const res = await fetch('/api/cars', {
        body: JSON.stringify(formData),
        headers: {
          'Content-Type': 'application/json',
        },
        method: 'POST',
      });

      const result = await res.json();
      console.log(result)
    };

    return (
      <form onSubmit={handleSubmit}>
        <input name="make" type="text"  />
        <input name="model" type="text"  />
        <input name="image" type="text"  />
        <textarea name="description" type="text"  />

        <button type="submit">Create Car</button>
      </form>
    );
  }
Fulltext Instant Search
Now that we can save entities, let’s use RediSearch to index and query our data.
Create an Index
Before we can query our data, we need to create an index. This is a one-time operation that needs to be done whenever the schema changes.
export async function createIndex() {
    await connect();

    const repository = new Repository(schema, client);
    await repository.createIndex()
}
For convenience, we can create an API route to run this code.
import { createIndex } from '../../lib/redis';

export default async function handler(req, res) {
  await createIndex();
  res.status(200).send('ok');
}
Search Query
Use the where method to access keys on each entity. Redis OM makes it easy to chain multiple queries together with or.
export async function searchCars(q) {
  await connect();

  const repository = new Repository(schema, client);

  const cars = await repository.search()
      .where('make').eq(q)
      .or('model').eq(q)
      .or('description').matches(q)
      .return.all();

  return cars;
}
Now create an API route to execute the search query.
import { searchCars } from '../../lib/redis';

export default async function handler(req, res) {
  const q = req.query.q;
  const cars = await searchCars(q);
  res.status(200).json({ cars });
}
Autocomplete Search Form
The final step is to implement a React component to display the results of the search query.
import { useState } from 'react';

export default function CarForm() {
  const [hits, setHits] = useState([]);

  const search = async (event) => {
    const q = event.target.value;

    if (q.length > 2) {
      const params = new URLSearchParams({ q });

      const res = await fetch('/api/search?' + params);

      const result = await res.json();
      console.log(result);
      setHits(result['cars']);
    }
  };

  return (
    <div>
      <input onChange={search} type="text" />

      <ul>
        {hits.map((hit) => (
            <li key={hit.entityId}>
              {hit.make} {hit.model}
            </li>
          ))}
      </ul>
    </div>
  );
}
